
NextJS is a powerful React framework that we can use to deploy directly from GitHub to AWS Amplify. We will also be using CodeSandbox to work with the code before deploying.

Working with CodeSandbox
After creating the GitHub repo, we will import the code into a CodeSandbox project. This will allow us to work with and explore the code before deploying to our Amplify App.
Creating AWS Credentials
Because this demo will use an AWS SDK request (DescribeInstances), we will need to configure credentials that include permission to make this request. In order to do this, we will be creating a User and assigning it a Role. This Role should be limited in scope to only the Action that is required.
{
  "Version": "2012-10-17",
  "Statement": [
    {
      "Sid": "DescribeInstances",
      "Effect": "Allow",
      "Action": "ec2:DescribeInstances",
      "Resource": "*"
    }
  ]
}
When this User is created, you will get an AWS_ACCESS_KEY_ID and AWS_SECRET_ACCESS_KEY. We will be using these to configure our application so that it has permissions to DescribeInstances.
Adding AWS Credentials
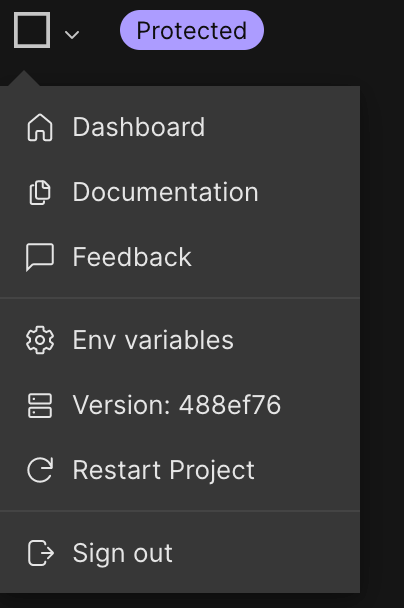
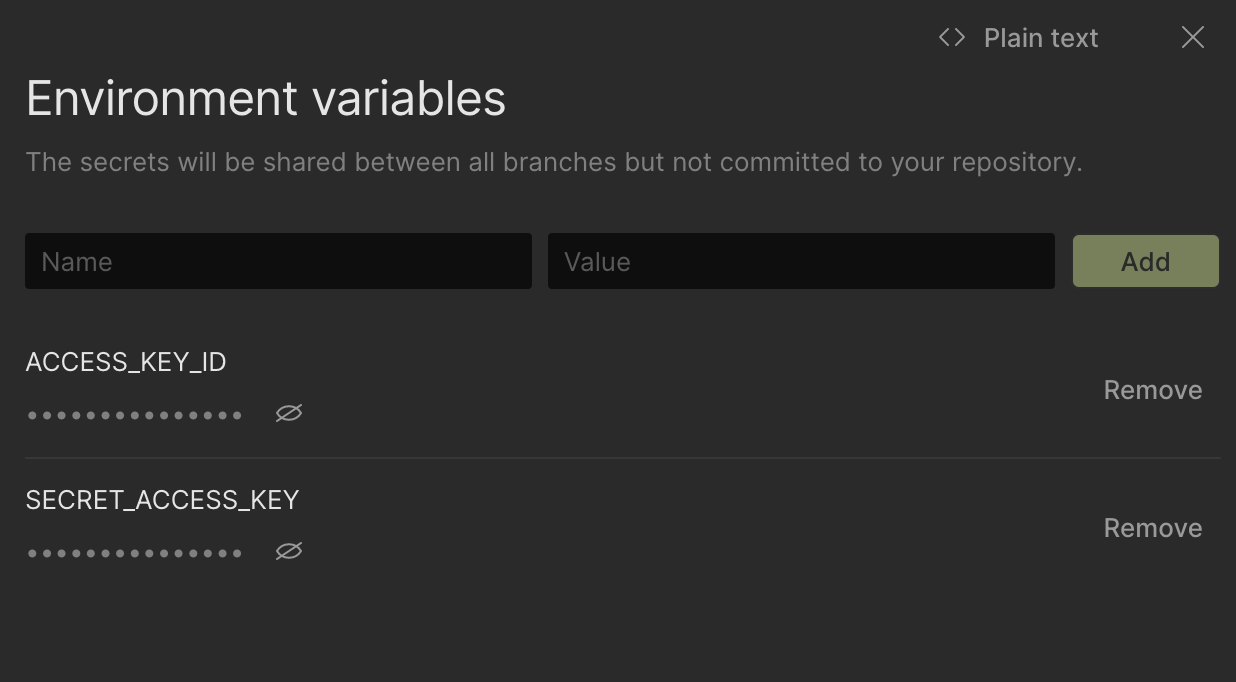
After the AWS Credentials have been created, they must be added to the application. To do this with Code Sandbox, we will use Environment Variables in our container. If you want to make changes, you will need to fork this project. When you do this, these environment variables will not be copied so you must use your own AWS Credentials.
Using the AWS SDK with Credentials
After configuring the Environment Variables in Code Sandbox, we can use the AWS SDK in the pages/api/instances.js file.
import { EC2Client, DescribeInstancesCommand } from "@aws-sdk/client-ec2";
const config = {
  region: "us-east-1",
  credentials: {
    accessKeyId: process.env.ACCESS_KEY_ID,
    secretAccessKey: process.env.SECRET_ACCESS_KEY,
  },
};

const client = new EC2Client(config);
next.config.js
To pass Environment Variables to Amplify, we need to modify the next.config.js file. We'll be adding these same Environment Variables to Amplify a little later.
const withTranspileModules = require("next-transpile-modules");
const withPlugins = require("next-compose-plugins");

module.exports = withPlugins(
  [withTranspileModules(["@cloudscape-design/components"])],
  {
    env: {
      ACCESS_KEY_ID: process.env.ACCESS_KEY_ID,
      SECRET_ACCESS_KEY: process.env.SECRET_ACCESS_KEY,
    },
  },
);
amplify.yml
To configure the build of the Amplify application, we include amplify.yml and instruct it to use Node version 16 as part of the build.
version: 1
frontend:
  phases:
    preBuild:
      commands:
        - nvm use $VERSION_NODE_16
        - npm ci
    build:
      commands:
        - nvm use $VERSION_NODE_16
        - npm run build
  artifacts:
    baseDirectory: .next
    files:
      - "**/*"
  cache:
    paths:
      - node_modules/**/*
Result
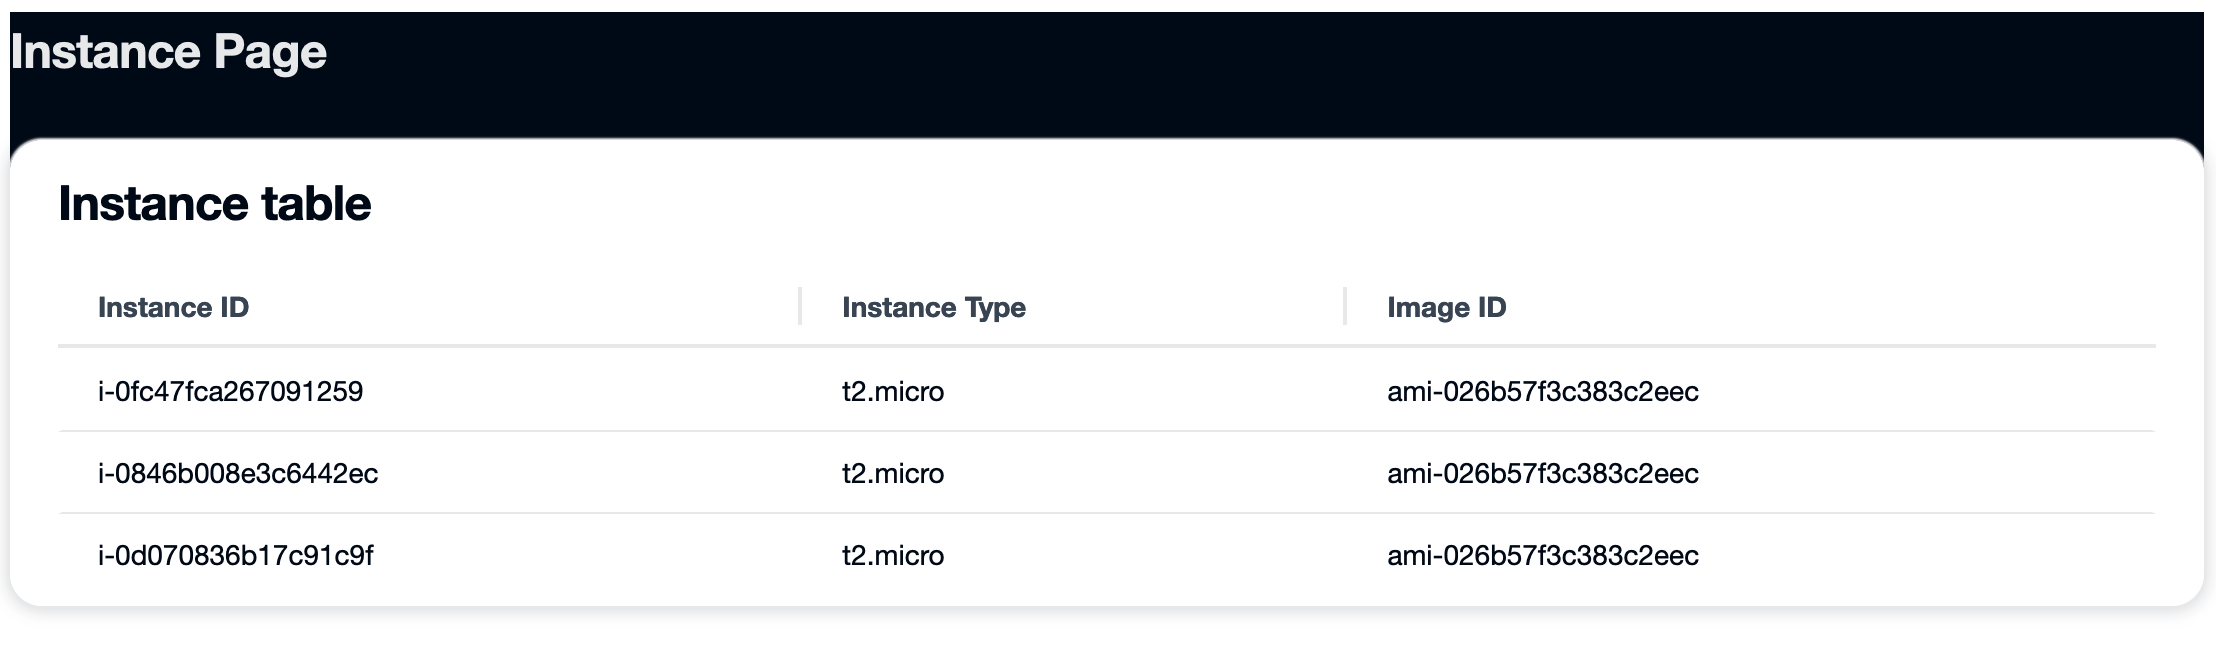
Now that we have our API configured with credentials, when the front end application uses this API, we will query the associated account for active instances in us-east-1 and display them on a simple page. We can see these results live in our Code Sandbox now before we deploy to Amplify to ensure everything looks the way we want it.
Deploying in AWS Amplify
In order to deploy to AWS Amplify, we will need to use the GitHub Apps feature to authorize Amplify to read your GitHub repository.
Begin Deploy
After clicking the above Deploy to Amplify Console link, you will begin the process of deploying to Amplify.

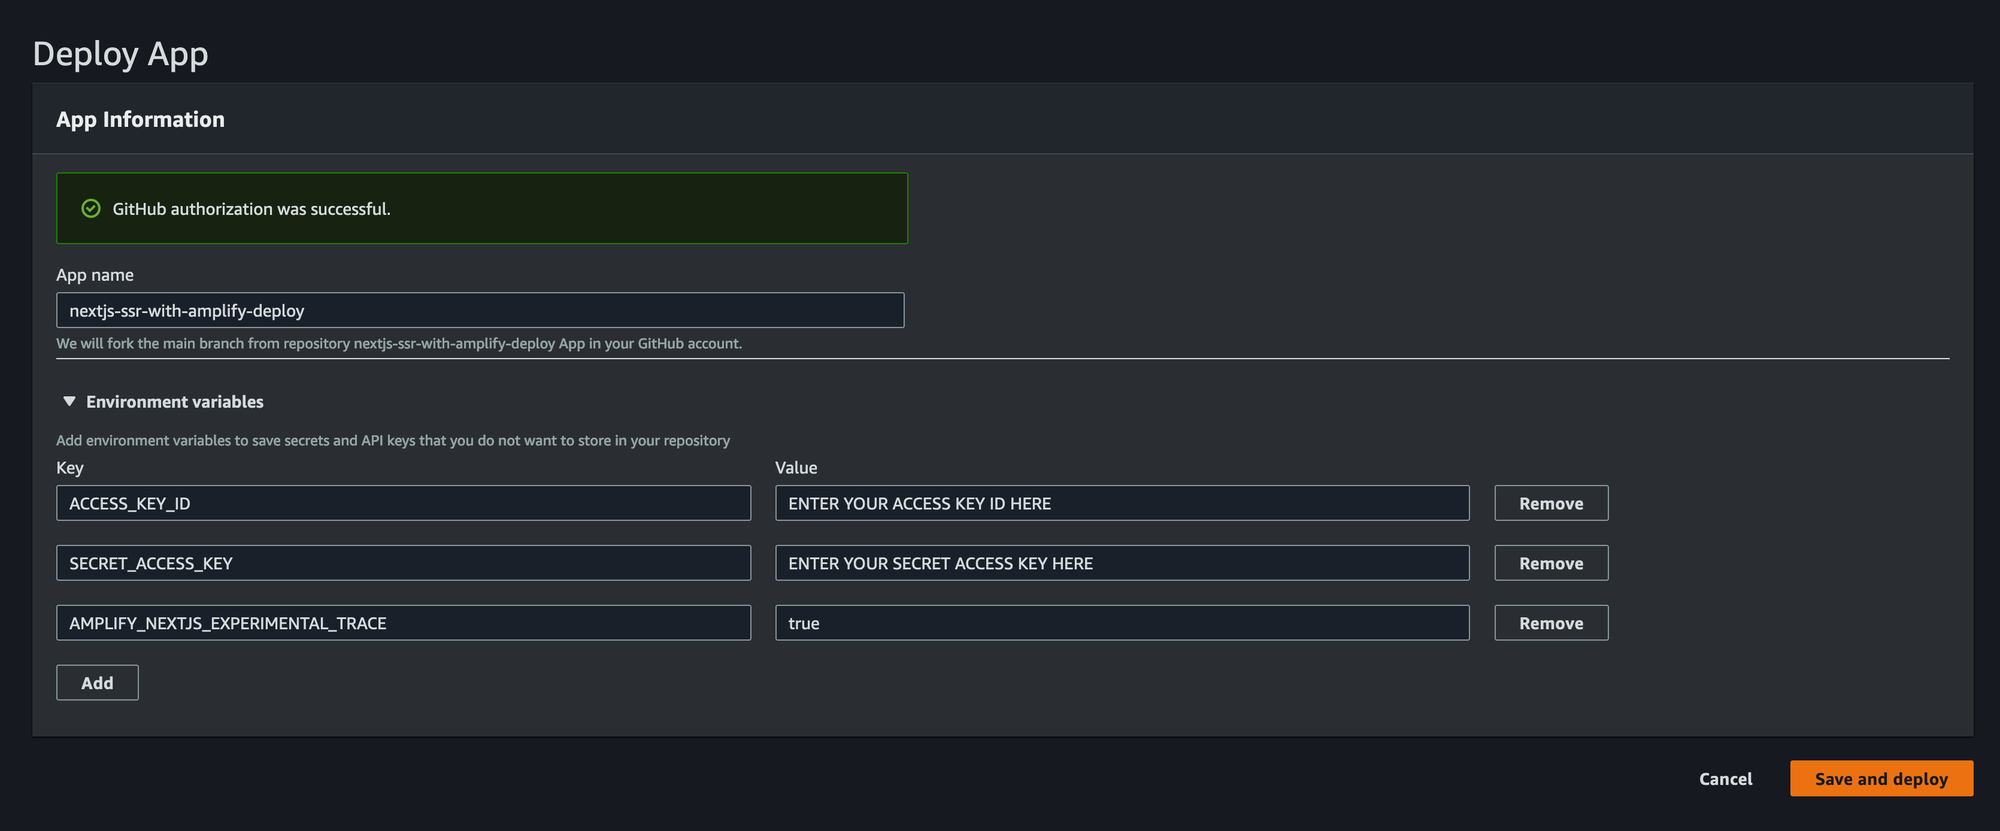
Add Environment Variables
At the next screen, you will be able to add Environment Variables. Please note the additional Environment Variable needed in addition to your Access Key ID and Secret Access Key:
AMPLIFY_NEXTJS_EXPERIMENTAL_TRACE = true
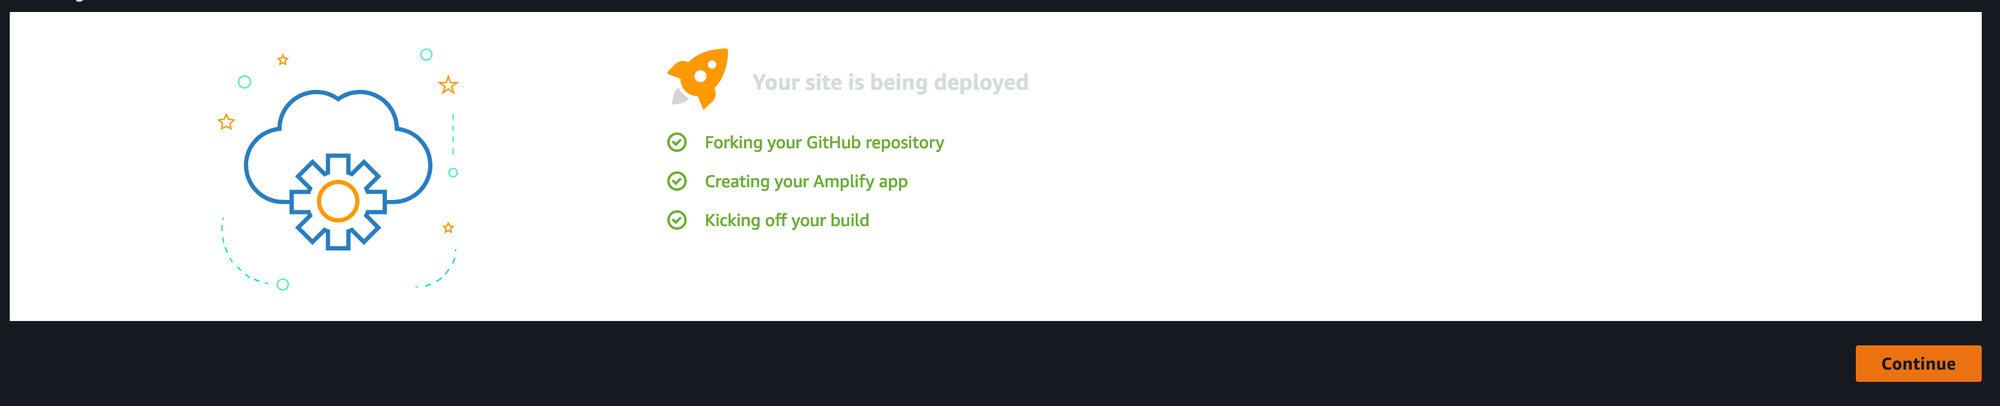
Deploying
Once added, the App will being deploying. This will fork the repository into your GitHub account and begin installing to Amplify.
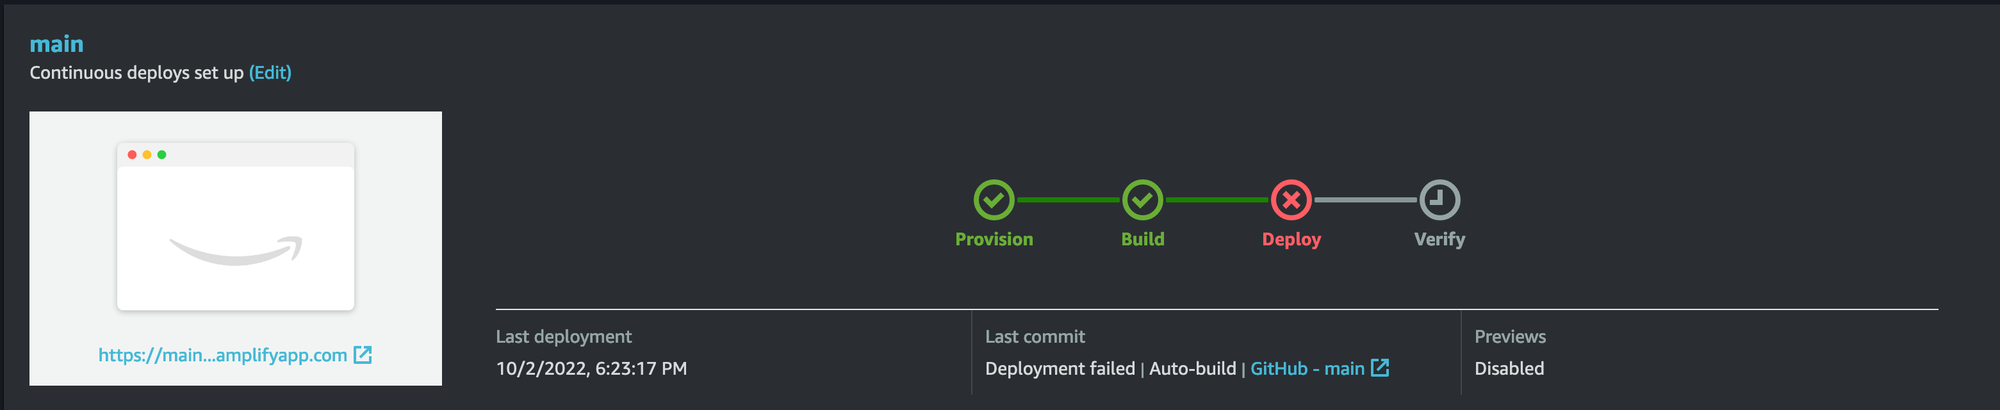
Deploy Failure
This first deploy should result in a failure to deploy that we will be fixing next.
Finalizing Amplify Configuration
In order to deploy an SSR Application on AWS Amplify, we must add appropriate Service Role permissions to correct this error:
Cannot find any generated SSR resources to deploy. If you intend for your app to be SSR, please check your app Service Role permissions. Otherwise, please check out our docs on how to setup your app to be detected as SSG (https://docs.aws.amazon.com/amplify/latest/userguide/server-side-rendering-amplify.html#deploy-nextjs-app)
Add Service Role
In the App settings, select General and Edit. If there is no available Service role, you will need to create a new service role.
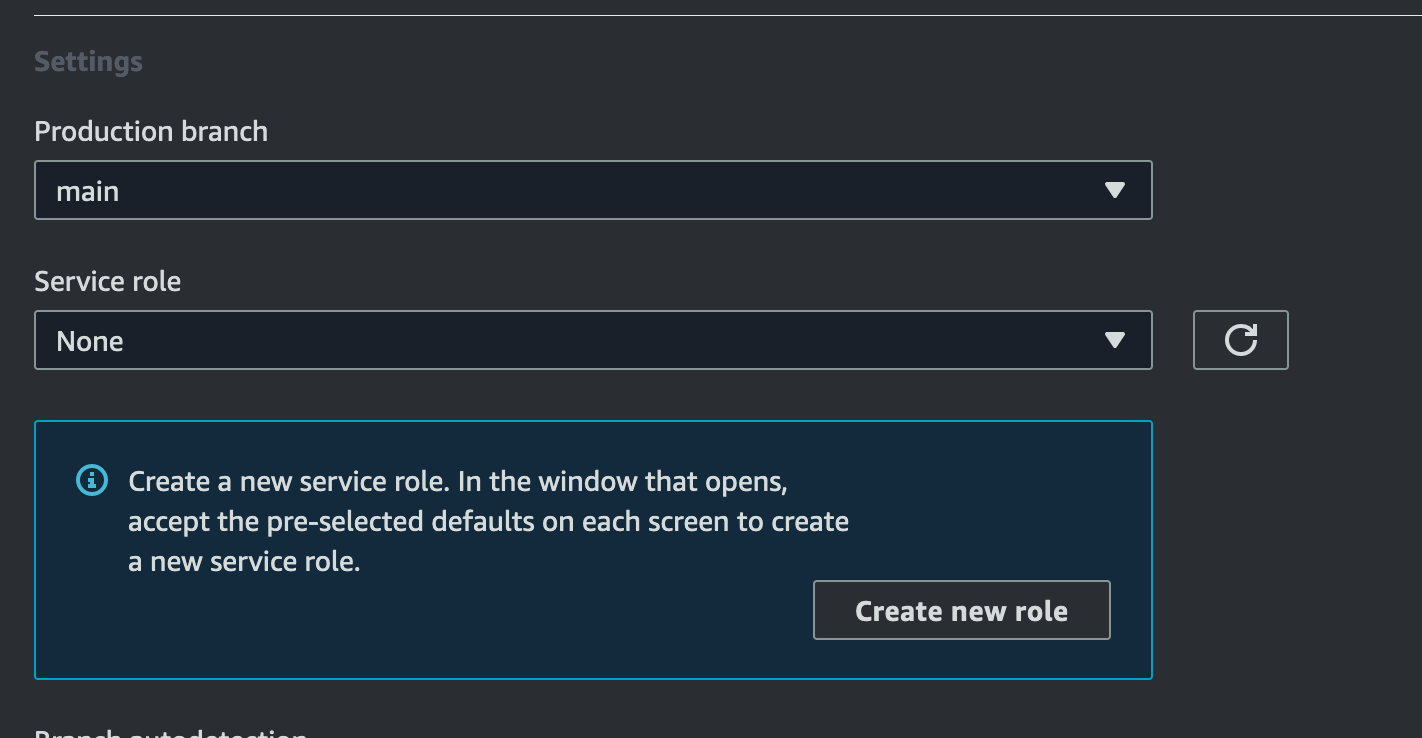
Follow the prompts to create a new Service Role, assign that role in the Amplify App settings, and then Save.
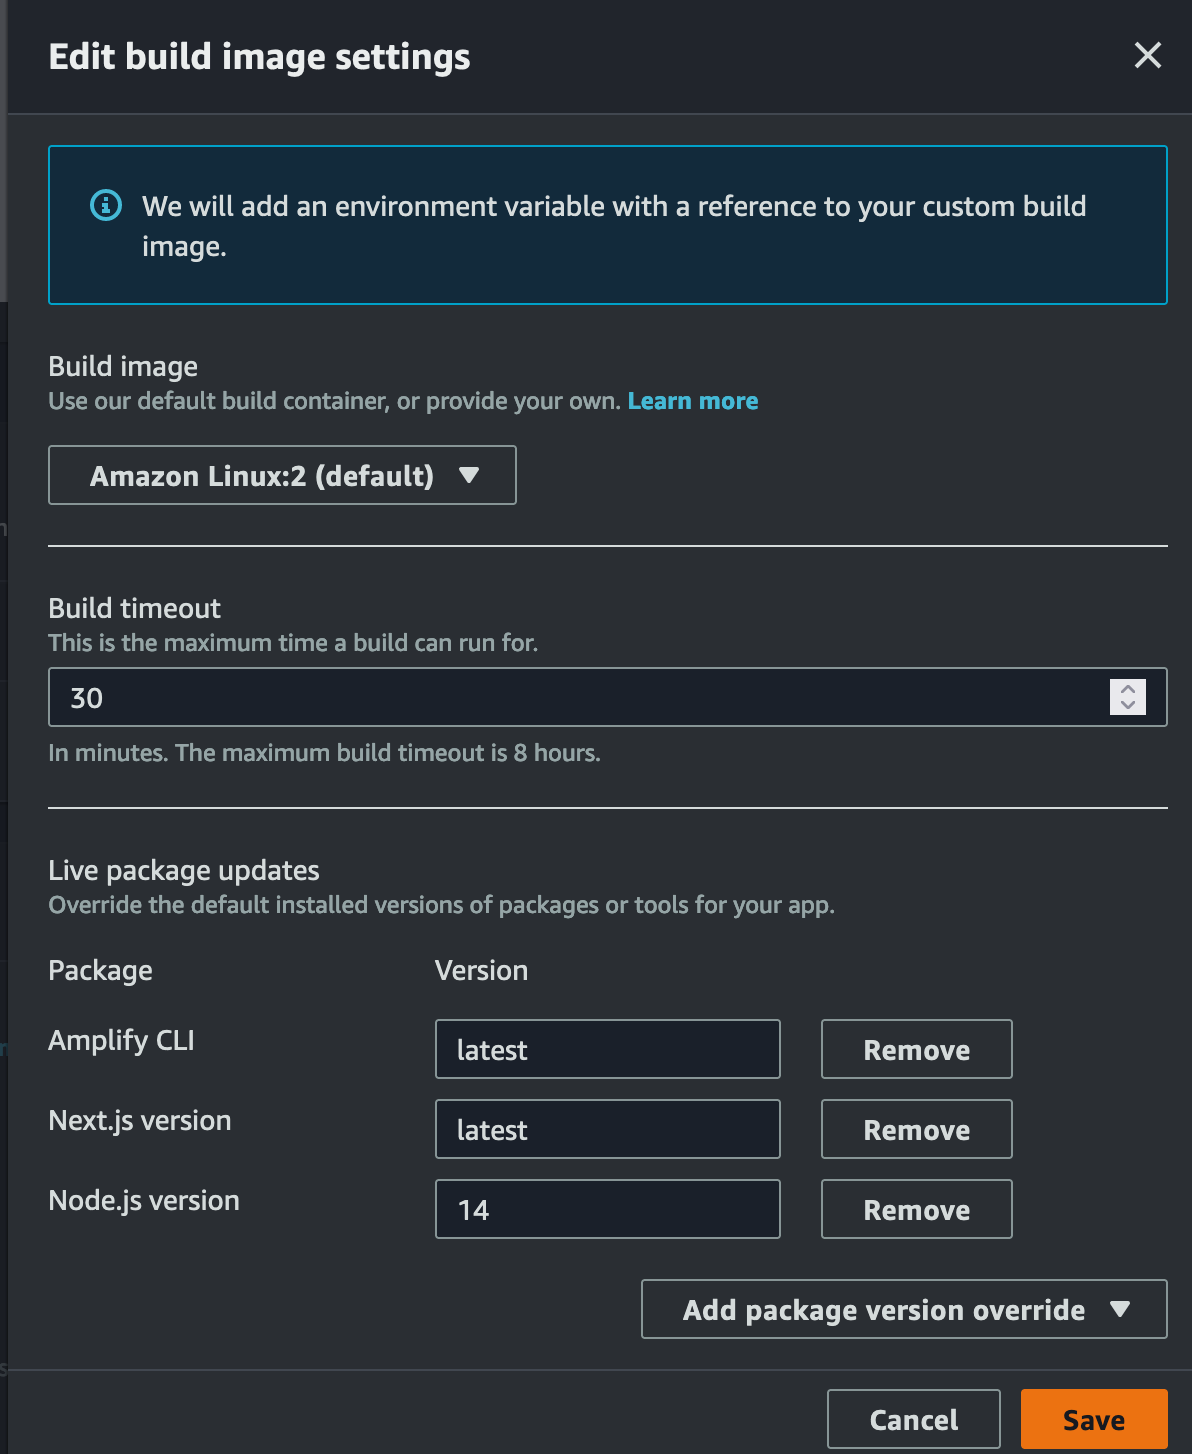
Update Build Settings
Additionally, you should configure the Build image settings. In the App settings, select Build settings and Edit. Set the Next.js version to latest and the Node.js version to 14. This will ensure the AWS Lambdas that are created as part of this application use Node version 14.
Redeploy
Return to your App and select Redeploy this version

Success!
Your app should now successfully deploy and can be accessed at the Domain shown in the console.
